
Assembly — Install the bins
Install the bins
How-to guideThe bins that catch what the chutes drop, and the three ways to get them.
Parts needed
Printed parts
One of these per layer
Half
- 6×Half-size layers only. 12 per layer, 6 left and 6 right.
- 6×Half-size layers only. 12 per layer, 6 left and 6 right.
Third
- 6×Third-size layers only. 18 per layer, 6 each of three.
- 6×Third-size layers only. 18 per layer, 6 each of three.
- 6×Third-size layers only. 18 per layer, 6 each of three.
Tools needed
- Hot glue gun, for cardboard bins
- Laser cutter, or a cutting service, for cardboard bins
- Sharp knife, metal ruler, A4 printer and paper or thin card stock, if you are cutting cardboard bins by hand
Bins go in last, after the electronics, so the chutes can be connected and their movement tested with the bays still empty. Nothing here is fastened: each bin drops into its bay and is held by the bin retainers that are already bolted to the frame.
The list above is per layer, and a layer takes one of the two sets, not both. Which set depends on the size of that layer's funnel, which is step 1.
Step 2 is three ways of getting the same bins, printed, laser cut or cut by hand. They fit the same frame, so the choice is cost and what you own.
Step 1 Check which set each layer takes
Each layer takes the set that matches the funnel already fitted to it.
- A half-size layer takes 12 bins: 6 Bin (half, left) and 6 Bin (half, right).
- A third-size layer takes 18 bins: 6 each of Bin (third, left), Bin (third, center) and Bin (third, right-back).
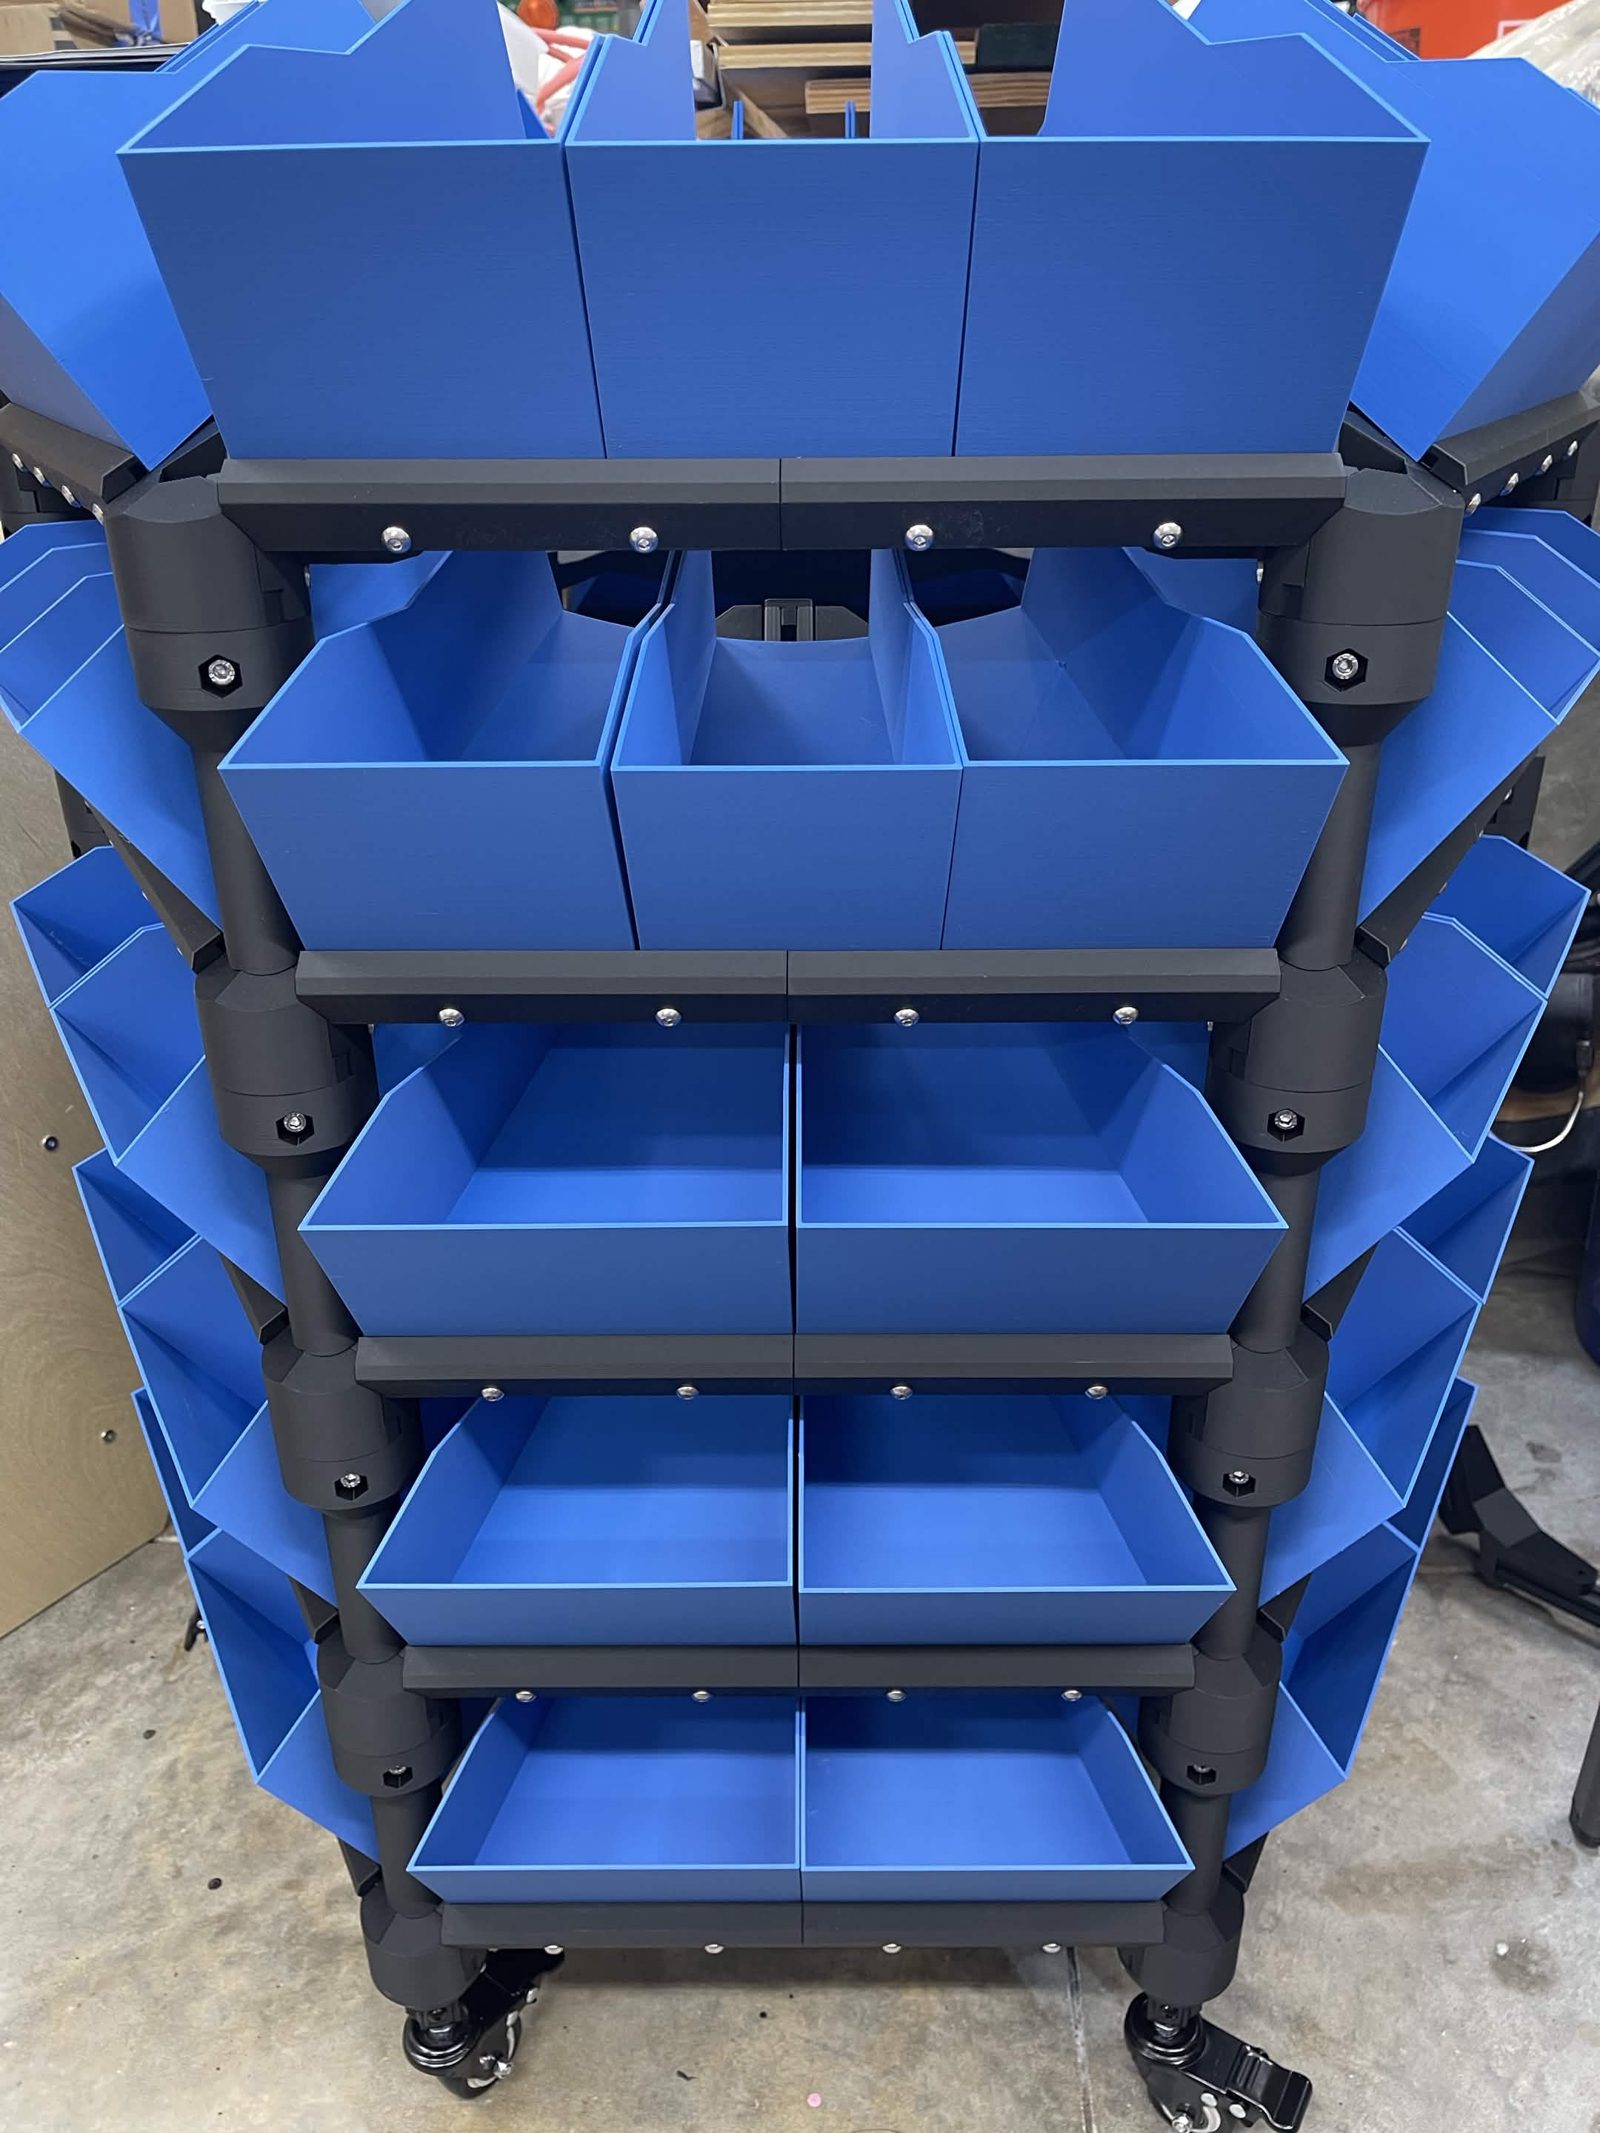
Six bays around the hexagon, with two bins in each bay on a half-size layer and three on a third-size one. A machine can mix the two sizes, in any order up the stack.
Changing a layer to the other size at this point means printing a new funnel as well as new bins. Funnel brackets is where that choice is made.
Step 2a Either: print the bins
Your layer's two or three bin parts are in the parts catalog with their STLs, printed the same way as everything else (Printing the parts). Nothing but a printer and time.
Budget for it, and start it early. A half set is about 2.1 kg of filament and 55 hours of printing per layer, a third set about 2.1 kg and 60 hours, so a five layer machine is roughly 10 kg and about 300 hours in bins alone. That is the single biggest print on the machine.
Step 2b Or: laser cut them from cardboard
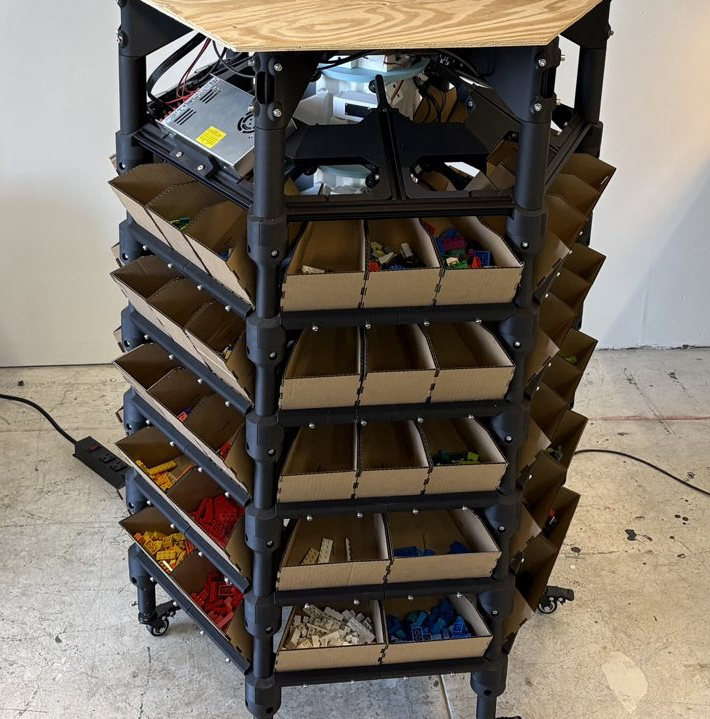
What the bins were designed for: cut flat, folded and glued. Cut them with the laser cut bin generator, which turns a bin into a foldable flat pattern.
- Pick your bin from the built-in bins list. You only need a CAD file if you have modified one, and then you drag your own
.stepin instead. - Set thickness to your stock. 1/8 inch cardboard is 3.175 mm, which is the default.
- Leave kerf compensation on, so the finger joints come out the size they were drawn.
- Export SVG or DXF to hand to somebody else's laser, or the LightBurn file if you are driving your own.
- Cut in colour order, green first, then blue, then red, with the green side face up. Green is the fold score and only goes through the first outside wall of the corrugation, so it has to be cut while the sheet is still whole. Blue perforations and red outlines are both full through cuts.
- Fold the bin up and glue the corners.
Glue the corners of a cardboard bin. The folded finger joints on their own do not hold in corrugated stock: most of the volume is air, so a finger usually lands on two paper walls with nothing between them. Hot glue is what the bins at Basically are held together with.
No laser of your own. A makerspace or an online laser cutting service will cut the sheets from the exported file. Each bin is one connected piece and cannot be split across two smaller sheets, so give them the size up front: on the default 3.175 mm stock a half-size bin's flat pattern is about 410 x 390 mm, and the largest of the three third-size ones about 345 x 300 mm.
Step 2c Or: cut them by hand
No laser and no cutting service: print a paper template, tape it together, and cut the cardboard with a knife. Four templates cover all five bins, because the two half bins are mirror images of each other and come off the same one.
Download the hand cutting templates, a zip of four PDFs. Each one opens with a cover sheet: a view down into the finished bin, what you need, and the eight steps. After that it tiles the pattern across A4, four sheets for a half bin, four for third left, three for third centre, two for third right-back.
You need a printer, A4 paper or thin card stock for the template itself, a sharp knife, a metal ruler, something to measure thickness with, tape, a hot glue gun and a pin.
- Print every sheet at 100% or Actual size, never Fit to Page. Thin card stock outlasts paper.
- Once printed, measure the bar at the foot of each page. It must be 100 mm. If it is not, the print is scaled: fix the setting and print again.
- Tape the sheets together on the registration crosses. The same cross is printed on both sheets of every overlap.
- Measure the thickness of the cardboard and follow the one outline that matches. Every template carries three, for 4, 5 and 6 mm stock, tagged along their length.
- Turn the template until the long double-headed FLUTES arrow runs the same way as the corrugations. Tape it down, draw round it, then lift it off and cut. Do not cut against the paper: you need the template a dozen times or more.
- Score the folds on the face that will be inside the bin, cutting the inner liner only, then fold towards the score.
- Fold the bin up and glue the corners.
Leave the toothed edge off. Each template draws a dotted straight line across it: cut there instead. The notches that key a bin onto the retainer's teeth are too fine to cut by hand in 4 to 6 mm corrugated. A bin without them still sits in its bay and is held by the same retainers, it just slides along the rail rather than locking to it.
One blank makes either hand. The face you score becomes the inside of the bin, so scoring the other face gives you the mirror bin and you never need a second template. Dry fold the paper both ways and hold it to an empty bay to see which is which: the toothed edge belongs along the bottom front, against the rail, and the narrow end points at the middle of the machine.
Step 3 Drop them in
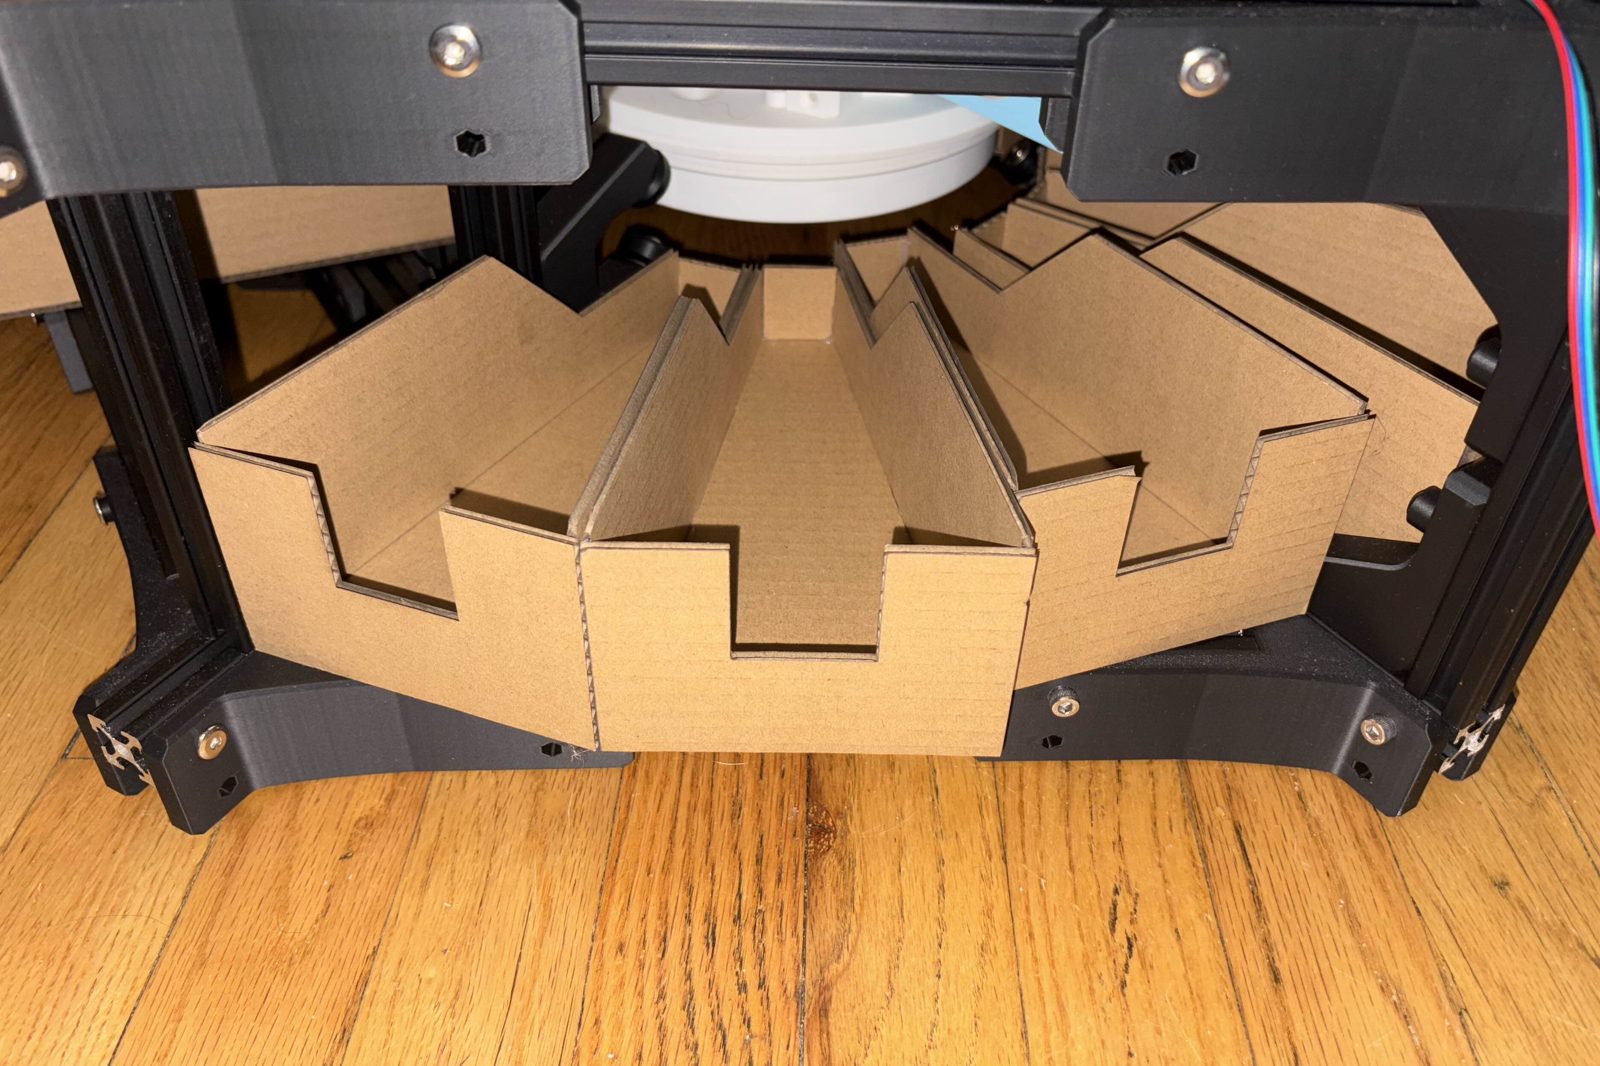
Work around one layer at a time. Each bin sits in its bay with the wide open mouth facing outward and the narrow end toward the middle of the machine, resting on the frame, with its front edge behind the Bin retainer (left) and Bin retainer (right) on the front face of that bay's A extrusion. The retainers bolt to the frame and not to the bin, which is why cardboard and printed bins are held the same way and why swapping one for the other later costs nothing.
A bin does not just sit behind the rail, it keys into it. The inner face of a retainer carries seven teeth just below its top edge, and the lower front edge of a bin is castellated to match, so a bin dropped into its bay lands with its notches over those teeth and is located along the rail rather than free to slide. Cut bins have the same edge: it is part of the flat pattern.
Push each bin fully back until it seats. If one stands proud, it is sitting on a tooth rather than over one: lift it and drop it again.
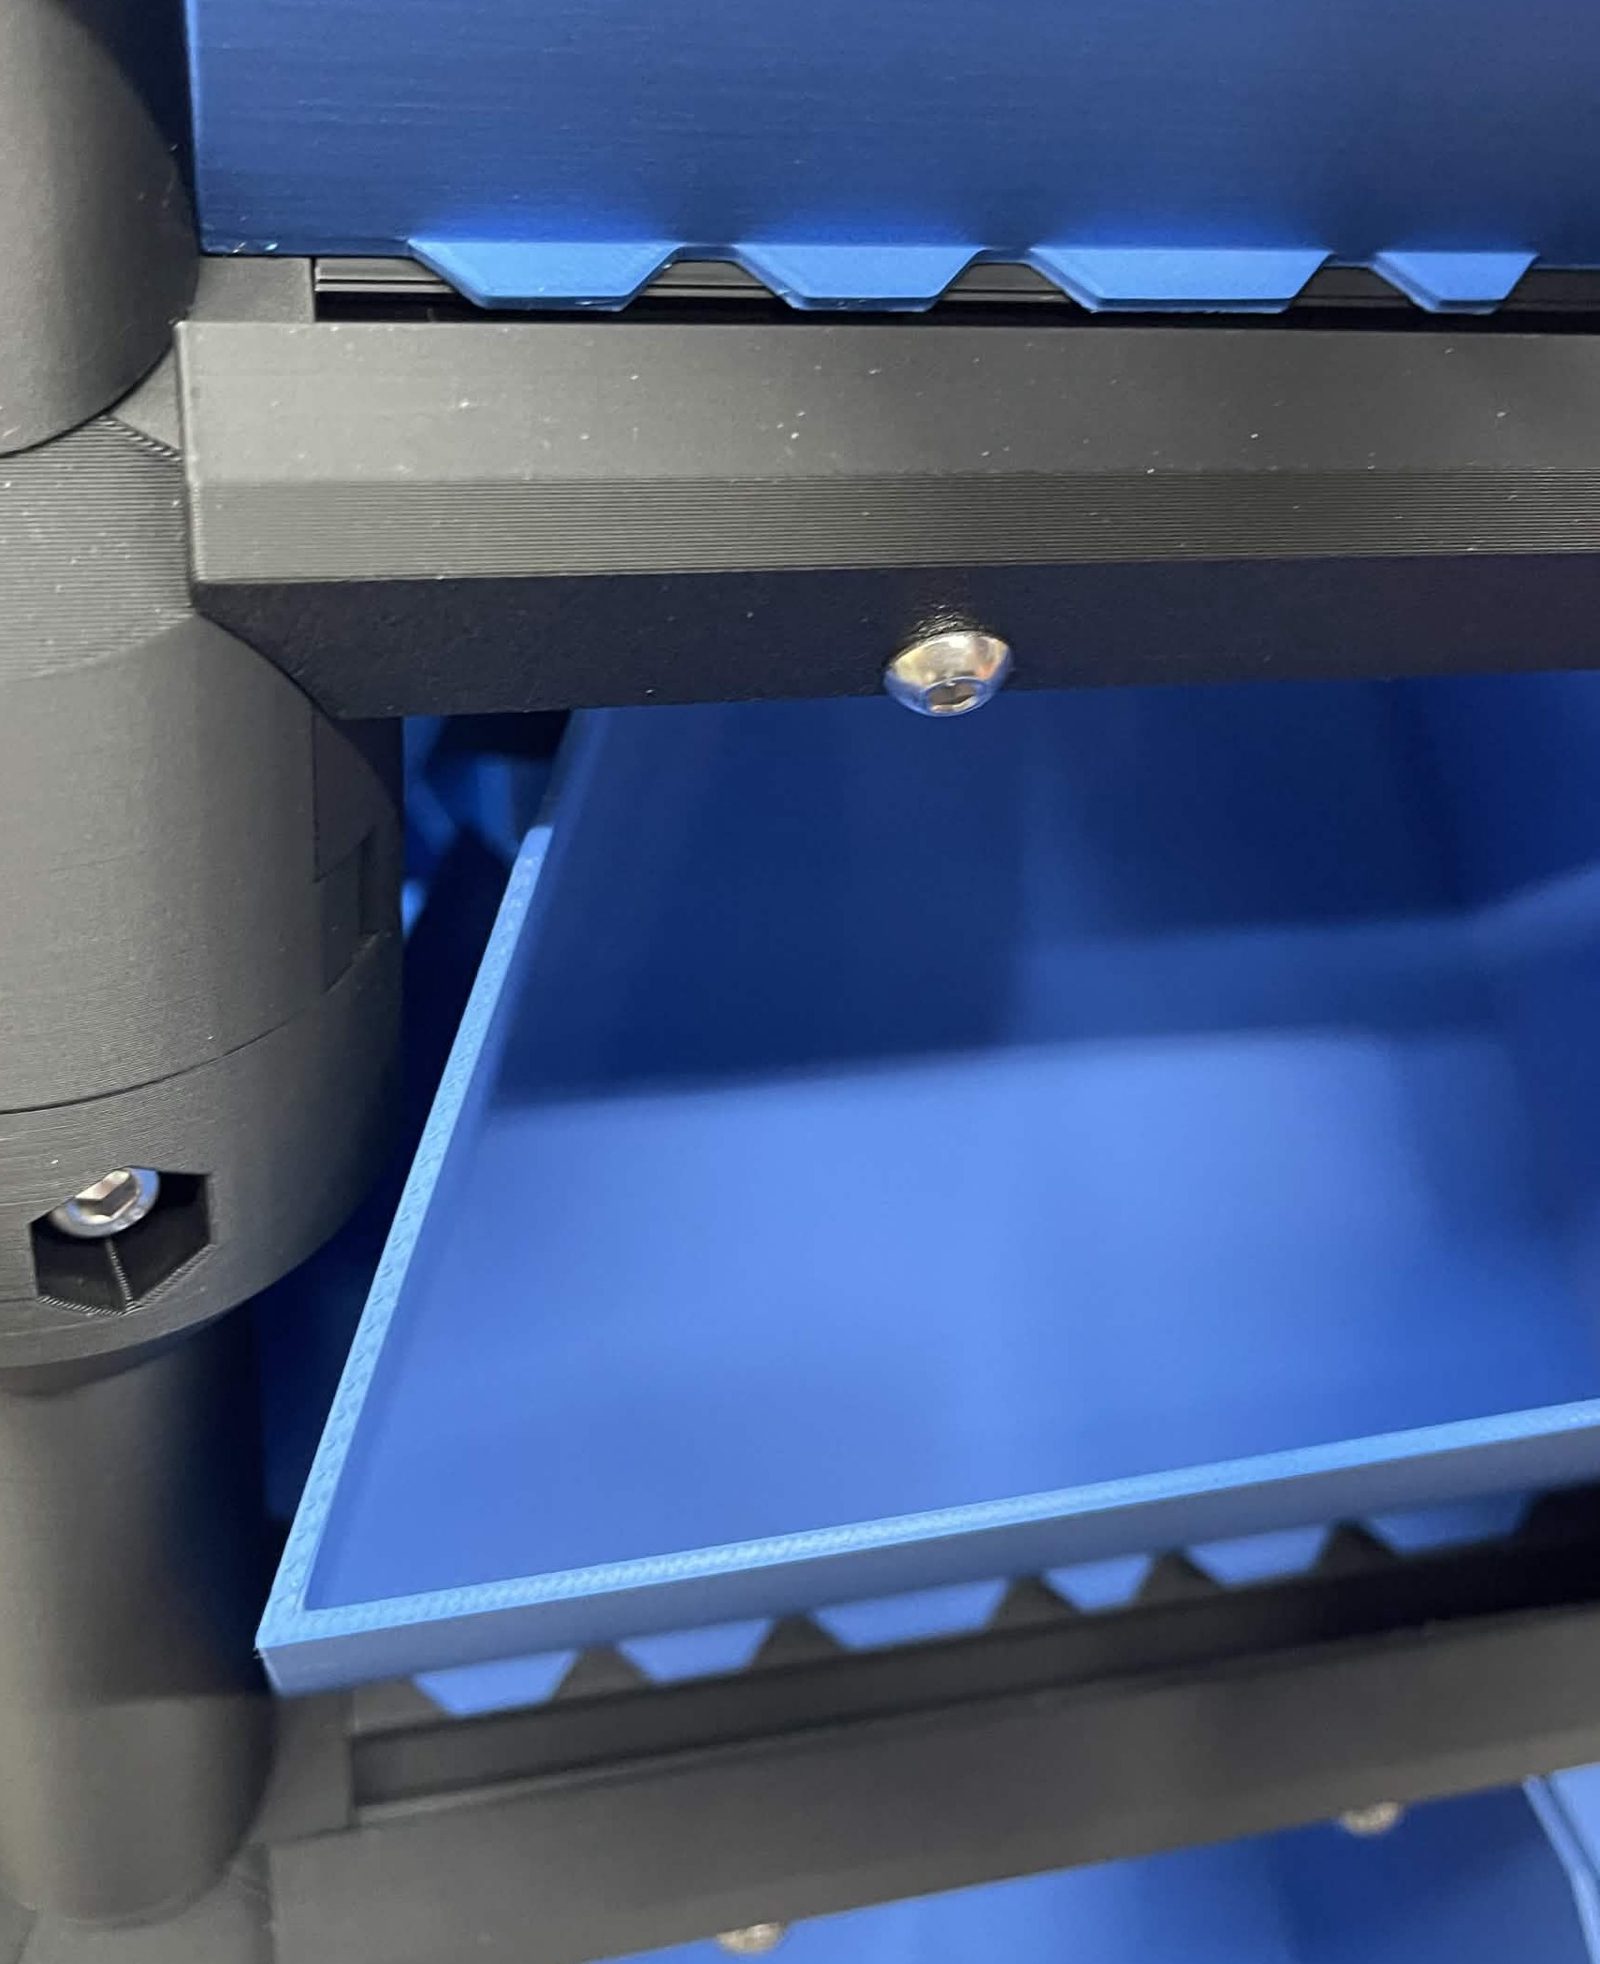
If the retainers are not on the frame yet, they go on first: 6 of each per layer, 2 M5 × 16 mm socket / button head each, into T-nuts fitted at that step. That step is on Bin retainers.
Step 4 Check the funnel clears every bin
The funnel lands right at the bin entrances by design, so there is very little gap for a piece to escape through, and very little room for a bin that is sitting proud of its bay. Before running the machine, turn the chute stack by hand to each end of its travel and watch that nothing touches. You will feel the chute stepper resisting; it should still turn smoothly against that. If a bin touches, push it fully back into its bay and turn again.
The finished result
Every bay on every layer loaded, and the chute turning clear of all of them.
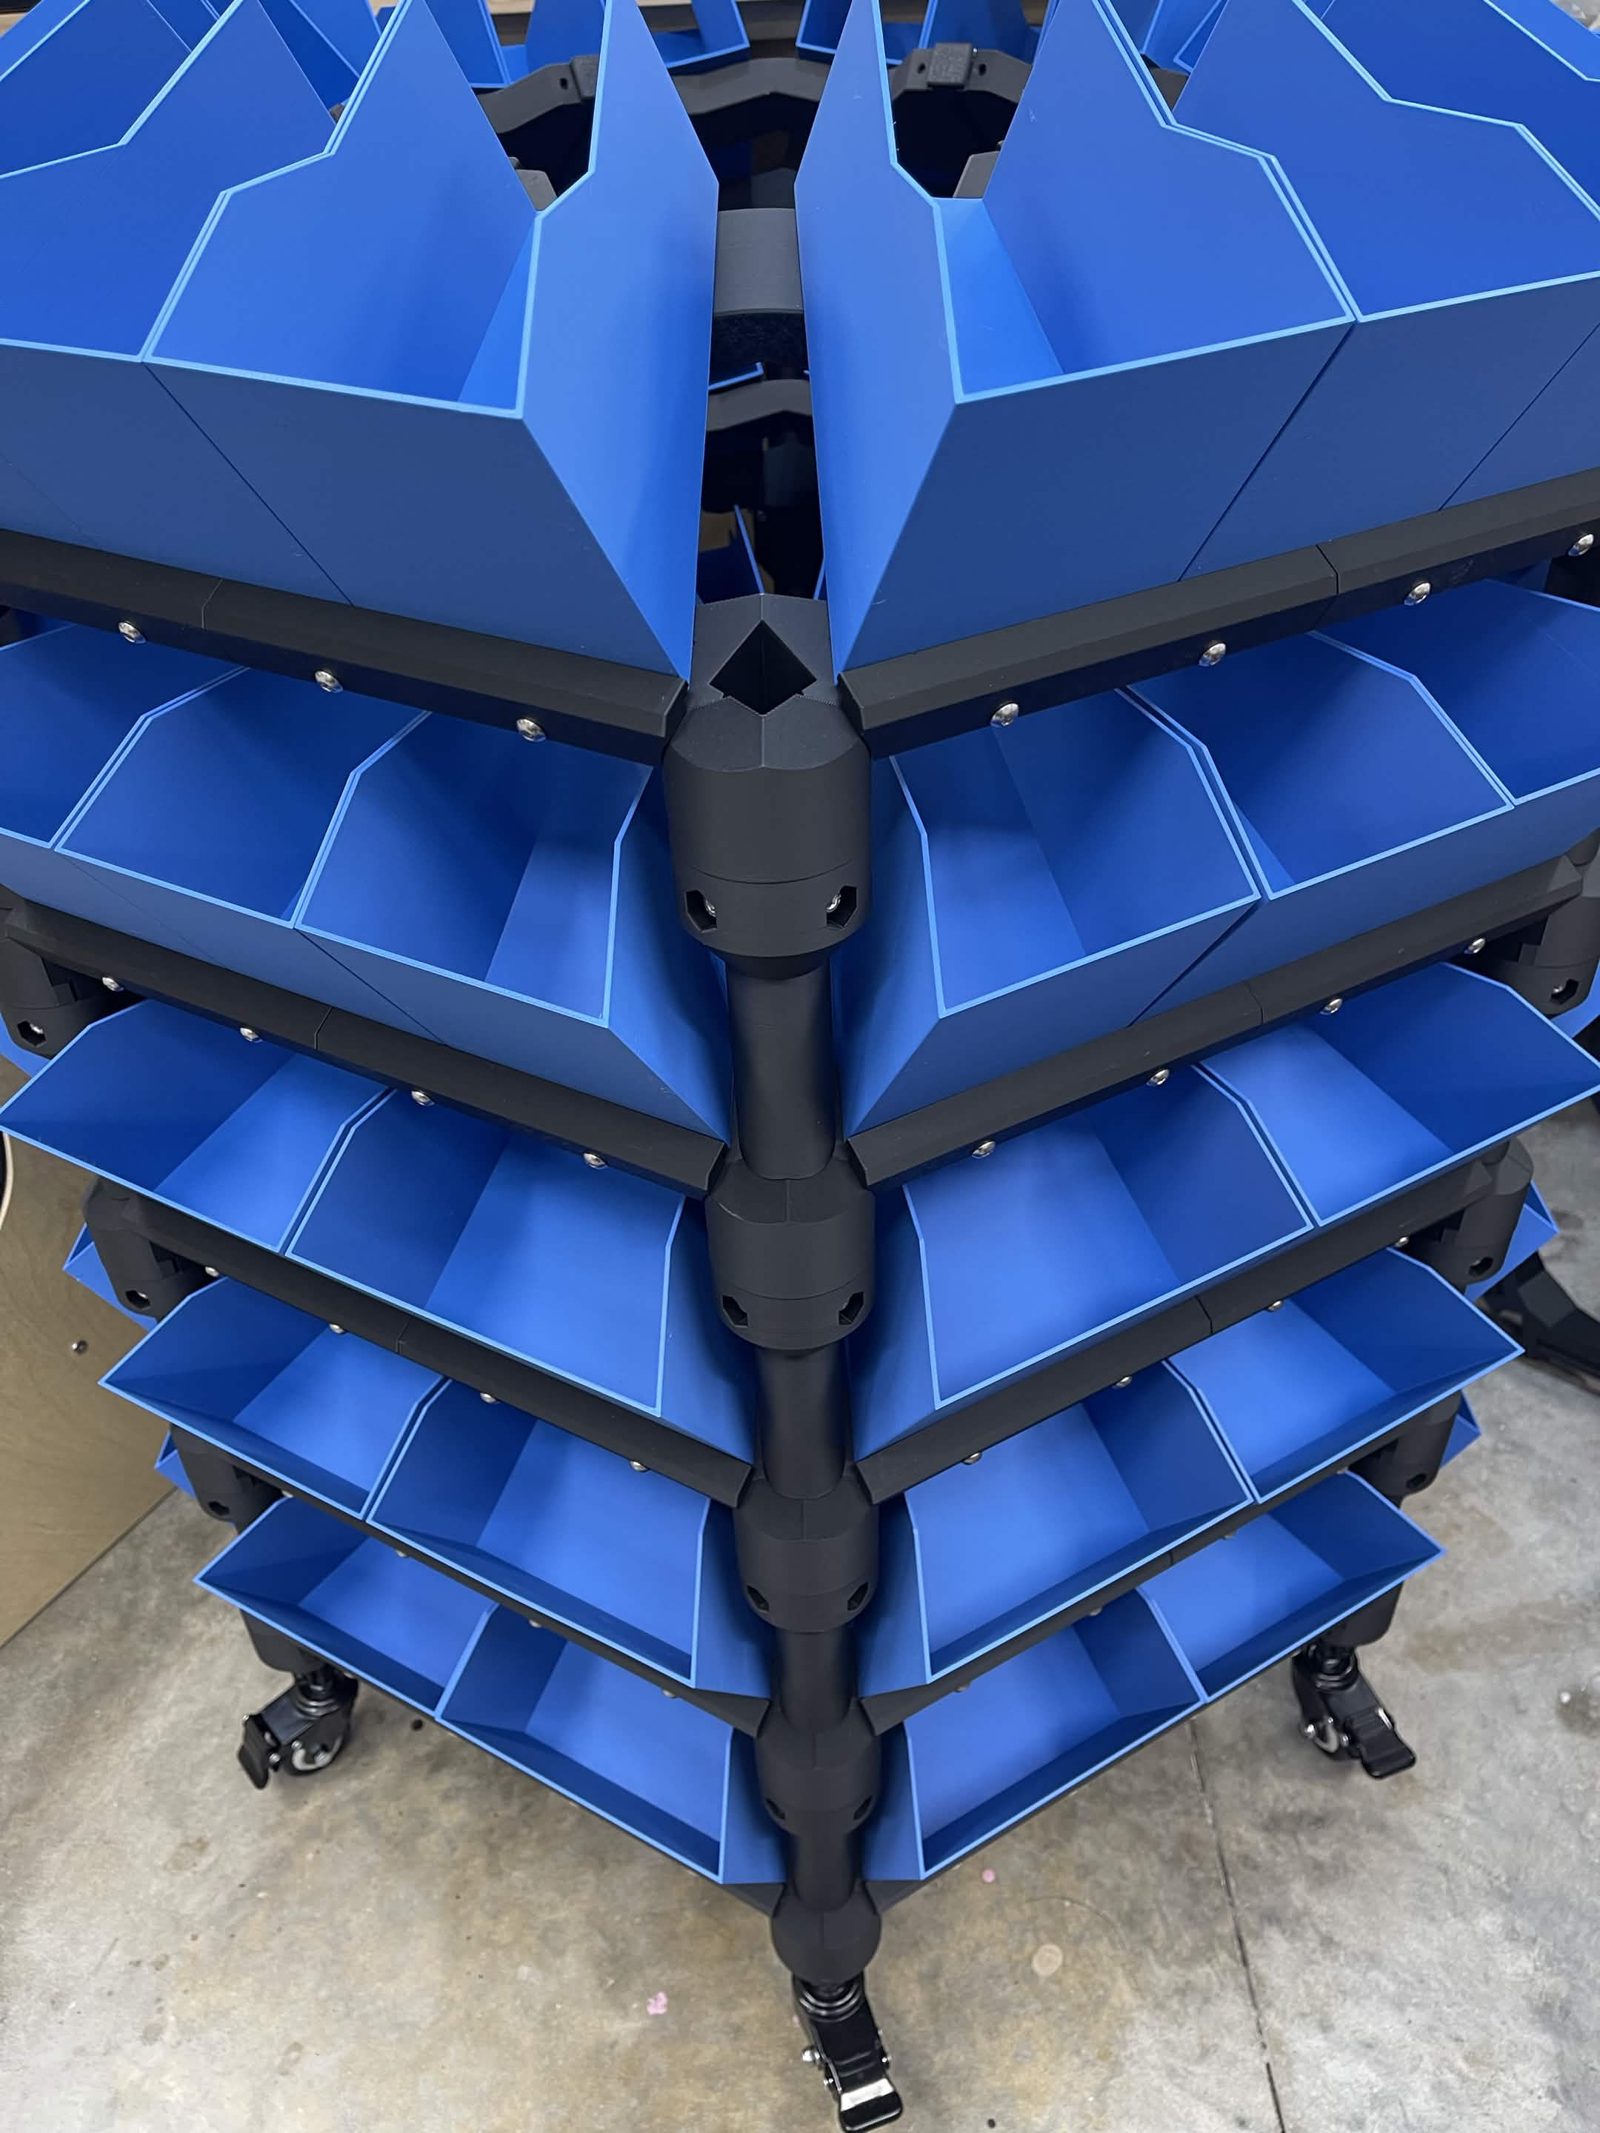
With the bins in, the hardware is finished. Continue to Software setup, which is where the machine is told how many bins each layer has and where they are.